Home Classes Tutorials Online Store Join
Showing posts with label Big Shot. Show all posts

Tuesday, April 4, 2017

Easter Treats with Basket Bunch Bundle


Here are some Easter treats using Stampin' Up!'s Basket Bunch Bundle.  The mini egg cartons have already sold out once and the second shipment is in San Francisco waiting to be released by US Customs.  Fortunately, I have enough mini egg cartons for my Easter class on Saturday, April 8, 2017.  

In class, you'll make 4 projects.  Three of the projects use the Basket Bundle Bunch.  The 4th item is from the March Paper Pumpkin kit.  It is the cutest Easter bunny treat bag.  While this kit also sold out quickly, I have one for each class participant.

The class is on Saturday, April 8th from 2 - 5p in Richland Hills.  You will get everything you need to complete your projects, including the plastic Easter eggs, except for adhesive.  The class fee is $20 and $15 for my stamp club members.  For more class details and to register, please contact me at sharon@sharoncheng.com.


The Basket Bunch bundle is great for making both Easter and spring projects

Visit my online store to get what you want for your next project.  Remember that when you purchase $25 or more in product, you are eligible for my Rewards Program.

Creatively yours,

Sharon Cheng
Richland Hills, TX
My Online Store

Thursday, December 24, 2015

Frosty Fry Box Tutorial with Sharing Creativity and Company


This fun Frosty Fry Box was CASEd from a project by Ronda Wade.  For those of you who know me, I did "Cheng-it-up" slightly.  This is a quick and easy project that can hold candy and other treats.


With this video tutorial, you'll get tips for making the Frosty treat holder using Stampin' Up!'s Fry Box or Pillow Box.  Learn an easy way to hold down your ribbon while you tie the bow.

Built for Free Using: My Stampin Blog

Visit my online store to get what you want for your next project.  Remember that when you purchase $25 or more in product, you are eligible for my Rewards Program.

Creatively yours,

Sharon Cheng
Richland Hills, TX
My Online Store

Wednesday, December 23, 2015

Punch Art Santa Curvy Keepsake Box Tutorial


This Punch Art Santa is quick, easy and fits Stampin' Up!'s Curvy Keepsake Box perfectly.  It can be a Christmas ornament, Secret Santa gift or a treat holder for that special someone.


In this video tutorial with Sharing Creativity and Company, you'll learn how to make the Santa face which will fit on other items too such as a star.  I'll also give you a tip on how to cut the Curvy Keepsake box from 8 1/2 x 11" paper.  Did you know that you can get 1 1/2 boxes from each sheet of paper?

We made this little Santa in my stocking stuffer class earlier in December.  It has been the most requested tutorial from that class.
Built for Free Using: My Stampin Blog


Visit my online store to get what you want for your next project.  Remember that when you purchase $25 or more in product, you are eligible for my Rewards Program.

Creatively yours,

Sharon Cheng
Richland Hills, TX
My Online Store

Tuesday, December 1, 2015

Botanical Gardens Occasions Catalog Sneak Peek


Botanical Gardens is a lush, tropical theme featured in Stampin' Up!'s upcoming Occasions catalog which starts on January 5, 2016.  As my time with the Splitcoaststampers Creative Crew wraps up, I used the Botanical Gardens theme along with two of the December Challenges.  This mini pizza box is one of my favorite treat boxes that can be decorated to fit any theme and only takes 1/2 a sheet of 8 1/2" x ll" cardstock.  You can fit a gift card along with a few treats in the box.  The sentiment comes from the Going Global stamp set (140748  $19).

I used the Botanical Builder Framelits Dies for both projects.  This is an easy way to cut intricate detailed flowers. 


The last challenge was to make a fun fold card.  I decided to make a quarter fold card using this Splitcoaststampers tutorial. Notice the black details on the Botanical Gardens Designer Series Paper?  Those are stamps from the Botanical Blooms stamp set that you can use to add details to the flowers.

Built for Free Using: My Stampin Blog

Visit my online store to get what you want for your next project.  Remember that when you purchase $25 or more in product, you are eligible for my Rewards Program.

Have fun checking out my Going Global sneak peek and other December Splitcoaststampers Creative Crew Challenges.

Creatively yours,

Sharon Cheng
Richland Hills, TX
My Online Store

Saturday, November 7, 2015

Pumpkin Tutorial with Sharing Creativity


These pumpkins are quick and easy to make using Stampin' Up!'s Designer Series Paper and are easy to store when you close them.


They are made with strips of paper that are opened to form the pumpkin and closed when it is time to put them away.


Here is the video tutorial for making these quick and easy pumpkins.


Built for Free Using: My Stampin Blog

Visit my online store to get what you want for your next project.  Remember that when you purchase $25 or more in product, you are eligible for my Rewards Program.

Creatively yours,

Sharon Cheng
Richland Hills, TX
My Online Store

Sunday, November 1, 2015

November Splitcoaststampers Creative Crew Challenges


The November Splitcoaststampers Creative Crew Challenges were all about Christmas and the Children (and the Child Within). One of my favorite things about making Christmas projects is how you find yourself smiling while you are crafting.  It's fun making them and then watching someone's face when they unwrap your homemade gift.  One of my friends call it a paper hug.  I love how that describes the love that is shared when you give a gift from your heart.

The snowman and Christmas tree ended up being my favorite project even though it didn't turn out the way I originally planned.  I used the Bohemian Designer Series Paper (138446  $11) and loved the results.  It's a good thing I like all different color combinations for Christmas!  Here is the tutorial for the project. 


This project almost designed itself.  I bought the glass container at an estate sale for $2 and knew I wanted to make a Christmas scene using the Santa and reindeer from the Home for Christmas Designer Series Paper (139592  $11).  The Sleigh Ride Edgelits Dies (139670  $19) were perfect for the background.  The snowflakes are from the Season of Cheer Designer Series Paper (139590  $11).


The leftovers from the Christmas scene project above inspired me to make this ornament.  Here are the details for making this Christmas ornament.


This picture of my brother and sister with Santa makes me laugh. Notice how Santa is the only person looking at the camera.  I can't imagine how my mom felt wanting to get the perfect photo and then ending up with this one!  However, this photo has triggered many more Christmas memories than our other "picture perfect" childhood photos.

This scrapbook layout is designed to fit the 6 x 8 Project Life Photo Pocket Page (135297 $6).  It uses the Home for Christmas Designer Series Paper (139592  $11) and Holidays Fancy Foil Designer Vellum (139597  $11).

For more Christmas inspiration using Stampin' Up! products, be sure to visit the Creative Crew Gallery on Splitcoaststampers.

Visit my online store to get what you want for your next project.  Remember that when you purchase $25 or more in product, you are eligible for my Rewards Program.

Creatively yours,

Sharon Cheng
Richland Hills, TX
My Online Store

Punch Art Snowman and Christmas Tree


This punch art snowman and Christmas tree is one of my favorite Christmas projects even though it didn't turn out the way I originally planned.  I started to make the tree using Stampin' Up!'s Seasons of Cheer Designer Series Paper and didn't like the way the paper looked cut up into strips.  I ended up changing the colors to fit the Bohemian Designer Series Paper and loved the results.  It's a good thing I like all different color combinations for Christmas!


You can see the details for the punch art snowman in this video.  The punch art snowman was inspired by Lisa Curcio. I changed up a few things to fit Stampin' Up!'s current punches. 

Here are the instructions including a video tutorial for the Christmas Tree from a card I did last year.  Because the tree in this project is a little shorter than one on the card, the strips of designer series paper are only 5/8".

Built for Free Using: My Stampin Blog

Visit my online store to get what you want for your next project.  Remember that when you purchase $25 or more in product, you are eligible for my Rewards Program.

Check out my other November Creative Crew Challenge projects for Splitcoaststampers.

Creatively yours,

Sharon Cheng
Richland Hills, TX
My Online Store

Sleigh Ride Ornament


This ornament using Stampin' Up!'s Sleigh Ride Edgelits and Christmas Greetings Thinlits is quick and easy to make.  The most difficult thing about this project is waiting for the glue to dry.


Here is the video tutorial for making this sleigh ride ornament.


Remember to use a thin window sheet for this project.  Cut it out as shown in this photo (I used paper that is easier to see than a window sheet). 

After everything has dried (remember when I said waiting for the glue to dry is the hardest part?), roll the window sheet and put it in the ornament.  Fill the ornament with "snow".  I prefer "glass glitter", chunky glitter or epsom salt.  Fine glitters and some of the faux snows tend to stick to the sides of the ornament instead of settling to the bottom of the ornament.

Built for Free Using: My Stampin Blog

You can see my other November projects for Splitcoaststampers Creative Crew Challenges. 

Visit my online store to get what you want for your next project.  Remember that when you purchase $25 or more in product, you are eligible for my Rewards Program.

Creatively yours,

Sharon Cheng
Richland Hills, TX
My Online Store

Tuesday, September 1, 2015

Snow Way Gift Bag


I love penguins so the Snow Place Bundle was one of my first must-haves from Stampin' Up!'s Holiday catalog.  At Stampin' Up!'s Convention, we got to use the Gift Bag Punch Board.  That inspired me to make this Snow Place Gift Bag for our demonstrator swap where the theme was Bags, Tags and Boxes.  And being a big fan of Stampin' Up!'s bundles, I also had to use the Flurry of Wishes Bundle to add snowflakes.


Thanks to the framelits, it was easy to die cut the Santa hat.  The Banner Triple Punch and Snow Flurry Punch make it quick and easy to add the embellishments.  And I have fallen in love with the Real Red PomPom Trim.


Here is the video tutorial for making this gift bag.  If you have never used the gift bag punch board, be sure to watch Stampin' Up!'s how to video for this punch board.  

The colors I used for this project were Soft Sky for the gift bag, Tuxedo Black, Real Red, Island Indigo and Daffodil Delight for the penguin's beak and feet. 

See more Christmas and Holiday projects that I made for the Splitcoaststampers Creative Crew September gallery.
Built for Free Using: My Stampin Blog

Visit my online store to get what you want for your next project.  Remember that when you purchase $25 or more in product, you are eligible for my Rewards Program.

Creatively yours,

Sharon Cheng
Richland Hills, TX
My Online Store

Friday, July 24, 2015

A Whole Lot of Lovely Tutorial with Sharing Creativity and Company


This quick and easy card uses Stampin' Up's! hostess stamp set, A Whole Lot of Lovely.  I tweaked the pattern from this card.

Notice how the flower and sentiment cover a lot of the card?  That gave me the opportunity to be frugal with my Bohemian Designer Series Paper and burlap ribbon. I ended up making 26 of these cards and still haven't used all of the two 12x12 sheets in this pattern that come in the package. And I had just enough ribbon left on a partially used roll to finish these cards.


This video shows you the hidden techniques I used to make the paper and ribbon last. You'll also see why Stampin' Up!'s Tear and Tape adhesive is my top choice for sticking down the burlap ribbon. While I love the added texture, you will want to use the right adhesive with this ribbon.


This video shares some time-saving tips that I used to make this card and my other convention swap.

Visit my online store to get what you want for your next project.  Remember that when you purchase $25 or more in product, you are eligible for my Rewards Program.

Creatively yours,

Sharon Cheng
Richland Hills, TX
My Online Store

Saturday, March 21, 2015

Punch Art Easter Bunny Treat Holder with Tutorial


Scallop Treat Holder 2 is easier to make than it looks and can be embellished to fit many different occasions.  Your friends will loving getting the Easter version decorated with this punch art bunny.  I've made this treat holder at several different workshops.  The initial reaction I get from my friends when I show them what we are going to make is that this project is going to be difficult.  After they make it, they want to make more because it is so quick and easy.


This is the original scallop treat holder that I made.  I tweaked the design so it could be our Make and Take project at the Scrapbook Expo in Grapevine, TX earlier this year.  We wanted the project to be quick and easy for our visitors.  Because we were going to prep 200 of these treat holders, it also needed to be quick and easy for my friend, Christi, and I!


This was our Make and Take at Scrapbook Expo.  Because Stampin' Up!'s designer series paper has designs on both sides, that let us skip the stamped liner from the first version.  I also make the treat holder 1/4" narrower so I could get 6 projects from one 12 x 12 sheet.  An unexpected plus was that the straight edges made it much easier to line up the paper on the Simply Scored Scoring Tool.


Here is the video tutorial for making Scallop Treat Holder 2 and the punch art Easter Bunny.  Guess what punch I used to make the bunny ears?  I tried various oval punches and they were too big for this treat holder.  Turned out that the Flower Medallion punch was perfect for making the ears for this Easter Bunny.  You'll see how I did it in the video tutorial.

There are only 10 days left to get free Sale-A-Bration products.  You can get the supplies for this project from my online store and choose your Sale-A-Bration freebie too!

Stampin' Supplies for Scallop Treat Holder 2 
You can click on the image to go directly to my online store.
Built for Free Using: My Stampin Blog

Stampin' Supplies for the punch art Easter Bunny
Built for Free Using: My Stampin Blog

Visit my online store to get what you want for your next project.  Remember that when you purchase $25 or more in product, you are eligible for my Rewards Program.

Creatively yours,

Sharon Cheng
Richland Hills, TX
My Online Store

Wednesday, January 14, 2015

Petal Potpourri


One of my favorite bundles in Stampin' Up!'s Occasions catalog combines Stampin' Up!'s Petal Potpourri stamp set and Flower Medallion Punch for a 15% savings.  I like this combination because you can use it to make many different paper crafting projects.  When I saw the Splitcoaststampers Clean and Simple challenge to "Use Your Words", it was the perfect time to combine Petal Potpourri and the Hello You Thinlits to make some quick and easy cards.

This first card was actually a mistake that I liked so much that I plan to do it again.  Originally, I meant to cut the Best Year Ever designer series paper the same width as the Whisper White card stock.  Well, I didn't measure correctly and ended up having to leave a thin mat.  When you do something accidentally that you like, one of my teachers called it serendipity.  This was definitely a case of serendipity!


After making the first card, I had this leftover square of Best Year Ever designer series paper.  It was much too big a scrap to throw away!  So instead, I was inspired to make this card using the Stampin' Supplies.  I added some words from the Crazy About You stamp set.  This will be a great Operation Write Home card!

Notice the thin edge on the flower and Whisper White circle?  You can see the edging technique I used in this video tutorial using an Early Espresso Stampin' Marker.

The Hello You Thinlits are easy to cut out using this dryer sheet tutorial.  


This was actually my "warm up" card.  When I'm needing some inspiration, I find that CASEing a card can get my creativity going again.  By the time I get out the supplies needed to CASE (Copy And Share Everything) for a project, I find that I'm having to substitute something or fix a mistake.  The next thing I know, I've done a poor job of CASEing and have something more "original".  Some days I keep CASEing hoping that inspiration will come.  Even if it doesn't, I still have some great projects.  What do you do when you have a creative block?

These 3 cards use the following colors:  Calypso Coral, Crushed Curry, Early Espresso and Whisper White.  Stampin' Supplies with the price listed as SAB are Sale-A-Bration items that are free with a $50 purchase.  When you buy the Crazy About You and Hello You Bundle, you get to choose a free Sale-A-Bration item.
Built for Free Using: My Stampin Blog

Visit my online store to get what you want for your next project.  Remember that when you purchase $25 or more in product, you are eligible for my Rewards Program. When you buy $50 in product, you'll get to choose a free Sale-A-Bration product and two credits in my Rewards program. It's so easy to get free product during Sale-A-Bration.

Creatively yours,

Sharon Cheng
Richland Hills, TX
My Online Store

Thursday, January 8, 2015

Butterfly Wishes and Dryer Sheets


This is Day 4 out of 5 for Christa's and my mini blog hop featuring products from the Occasions and Sale-A-Bration catalogs.  The new Occasions catalog and Sale-A-Bration promotion started January 6th!  For every $50 you spend, you can pick one FREE Sale-A-Bration item.  Are you having fun getting different ideas for the products in both catalogs?  Check out our blogs every day this week for fresh ideas. You'll love Christa's projects featuring the Wood You Be Mine stamp set.  Christa's blog is Dusk till Dawn. Be sure to use Google translate to see her posts in English.

Today, I'm featuring the Butterfly Basics stamp set.  Did you know that you can order this stamp set in wood mount, clear mount or photopolymer?  You can also order it in a bundle with the Butterfly Thinlits. The clear mount bundle (139323  $51.75) is just over $50 so you can save 15% on the bundle and also pick a free Sale-A-Bration item during our promotion. WooHoo!


I'm been wanting a butterfly die, but dreaded the tedious work with such an intricate design.  Then one of my Stampin' Up! friends shared a tip for using dryer sheets to make this work easy peasy.  I liked the idea so much that I made a quick In-A-Minute video tutorial.  It will take only a minute (okay, really less than 2 minutes) to see 2 tips for making die cutting with thinlits a breeze. 


This picture tutorial has all of the details too.  This tip speeds things up so much I plan to use the butterfly die on a swap card.  I wouldn't be able to do that without using dryer sheets.   Try out the dryer sheet tip and let me know what you think. 

p.s.  I don't use dryer sheets for my regular laundry.  Imagine my neighbor's surprise when I asked if she had some dryer sheets I could have.  LOL.  Needless to say, I've bought my own now and they are in my craft area, not my laundry room.  I do recommend you invest in the unscented dryer sheets.

Visit my online store to get what you want for your next project.  Remember that when you purchase $25 or more in product, you are eligible for my Rewards Program.

Creatively yours,

Sharon Cheng
Richland Hills, TX
My Online Store

Wednesday, January 7, 2015

Hello Life Simply Created Kit


This is Day 3 out of 5 for Christa's and my mini blog hop featuring products from the Occasions and Sale-A-Bration catalogs.  The new Occasions catalog and Sale-A-Bration promotion started January 6th!  For every $50 you spend, you can pick one FREE Sale-A-Bration item.  Are you having fun getting different ideas for the products in both catalogs?  Check out both of our blogs every day this week for fresh ideas. You'll love Christa's cards featuring the You Plus Me stamp set.  Christa's blog is Dusk till Dawn. Be sure to use Google translate to see her posts in English.

Today, I'm featuring the Hello Life Simply Created Kit (137949, $24.95) from the Occasions catalog.  The kit even includes the 14" x 17" wire frame!  This kit combined with the Hello Life photopolymer stamp set (137136  $24.95) make this display board a quick and easy project.  Well, you really can't fluff the pom-poms quickly, but everything else is quick.  And it's all easy.


I made this video to share some tips and techniques I used while making the Hello Life display board.

Did you know that during Sale-A-Bration you can get the Hello Life Simply Created Kit for free?  When you join my team as a Stampin' Up! demonstrator, in addition to the $99 custom starter kit, you have two options for your Sale-A-Bration bonus.
      • Option #1: Receive a FREE Simply Created Project Kit from the occasions catalog with your Starter Kit
      • Option #2: Receive 2 FREE Sale-A-Bration items of your choice with your Starter Kit
OR when you host a workshop, you can earn $25 or more to spend on any Stampin’ Up! products with a qualifying party!  You could choose the Hello Life Simply Created Project Kit as your hostess reward.
Visit my online store to get what you want for your next project.  Remember that when you purchase $25 or more in product, you are eligible for my Rewards Program.  Spend $50 and choose one FREE Sale-A-Bration item!

Creatively yours,

Sharon Cheng
Richland Hills, TX
My Online Store

Monday, January 5, 2015

Scalloped Treat Holder Tutorial


The new Occasions catalog and Sale-A-Bration promotion starts January 6th!  My friend, Christa Halbesma, and I are celebrating with 5 days of new projects featuring stamp sets and other products from the Occasions and Sale-A-Bration catalogs.  Check out both of our blogs every day this week for fresh ideas. Christa's blog is Dusk till Dawn.  Be sure to use Google translate to see her posts in English. 

This Scalloped Treat Holder made with Stampin' Up!'s Scallop Circle Framelit and the Painted Petals stamp set is perfect for holding a Ghiradelli chocolate treat.  When I went to Stampin' Up!'s new Occasions and Sale-A-Bration catalogs kickoff in Plano in December, this was the stamp set that I won as a door prize.  So for our demonstrator Christmas party, I decided to use this stamp set to make my little stocking stuffer gift for my friends.


I adapted this treat holder from Out to Impress to fit Stampin' Up!'s Scallop Circle Framelit.  It is pretty quick and easy using the Simply Scored Scoring Tool.  I love how the Painted Petals stamp set make it look like you shaded or double stamped the flowers and leaves.  Because of how the stamp is made, you only need to stamp once!  The ink is darker in some places to give the illusion of a painted petal.


Stampin' Supplies

Item Description Price
138822 Painted Petals Stamp Set $24.95
130911 Circles Collection Framelits $26.95
122334 Simply Scored Scoring Tool $29.95
119859 Extra-Large Oval Punch $16.95
133787 Itty Bitty Accent Punch Pack $16.95
113439 Big Shot Die-Cutting Machine $99.95
130658 Magnetic Platform $39.95

Visit my online store to get what you want for your next project.  Remember that when you purchase $25 or more in product, you are eligible for my Rewards Program.  During Sale-A-Bration, for every $50 you spend, you can pick one exclusive item for free!  Buy the Painted Petals Stamp Set and Circle Collection Framelits and you qualify for one free Sale-A-Bration item!

Creatively yours,

Sharon Cheng
Richland Hills, TX
My Online Store

Wednesday, November 26, 2014

Christmas Stocking Stuffers


One of my favorite things about Christmas is making Stocking Stuffers.  Here are 7 different quick and easy Christmas projects that are perfect for Secret Santa gifts, teacher thank you's and adding to that stocking for someone special.


We made this mini gift box in stamp club.  It's perfect for holding a gift card along with some treats.


This little snowman pail can also be used for treats or a gift card.


These tags are quick and easy to make thanks to Stampin' Up! punches including the tree (135859 $16.95), star (133787 $16.95 for a set of 3) and scallop tag topper (133324 $22.95) punches.


This keepsake ornament will make a great tag that can be used to decorate your Christmas tree after opening your gift.


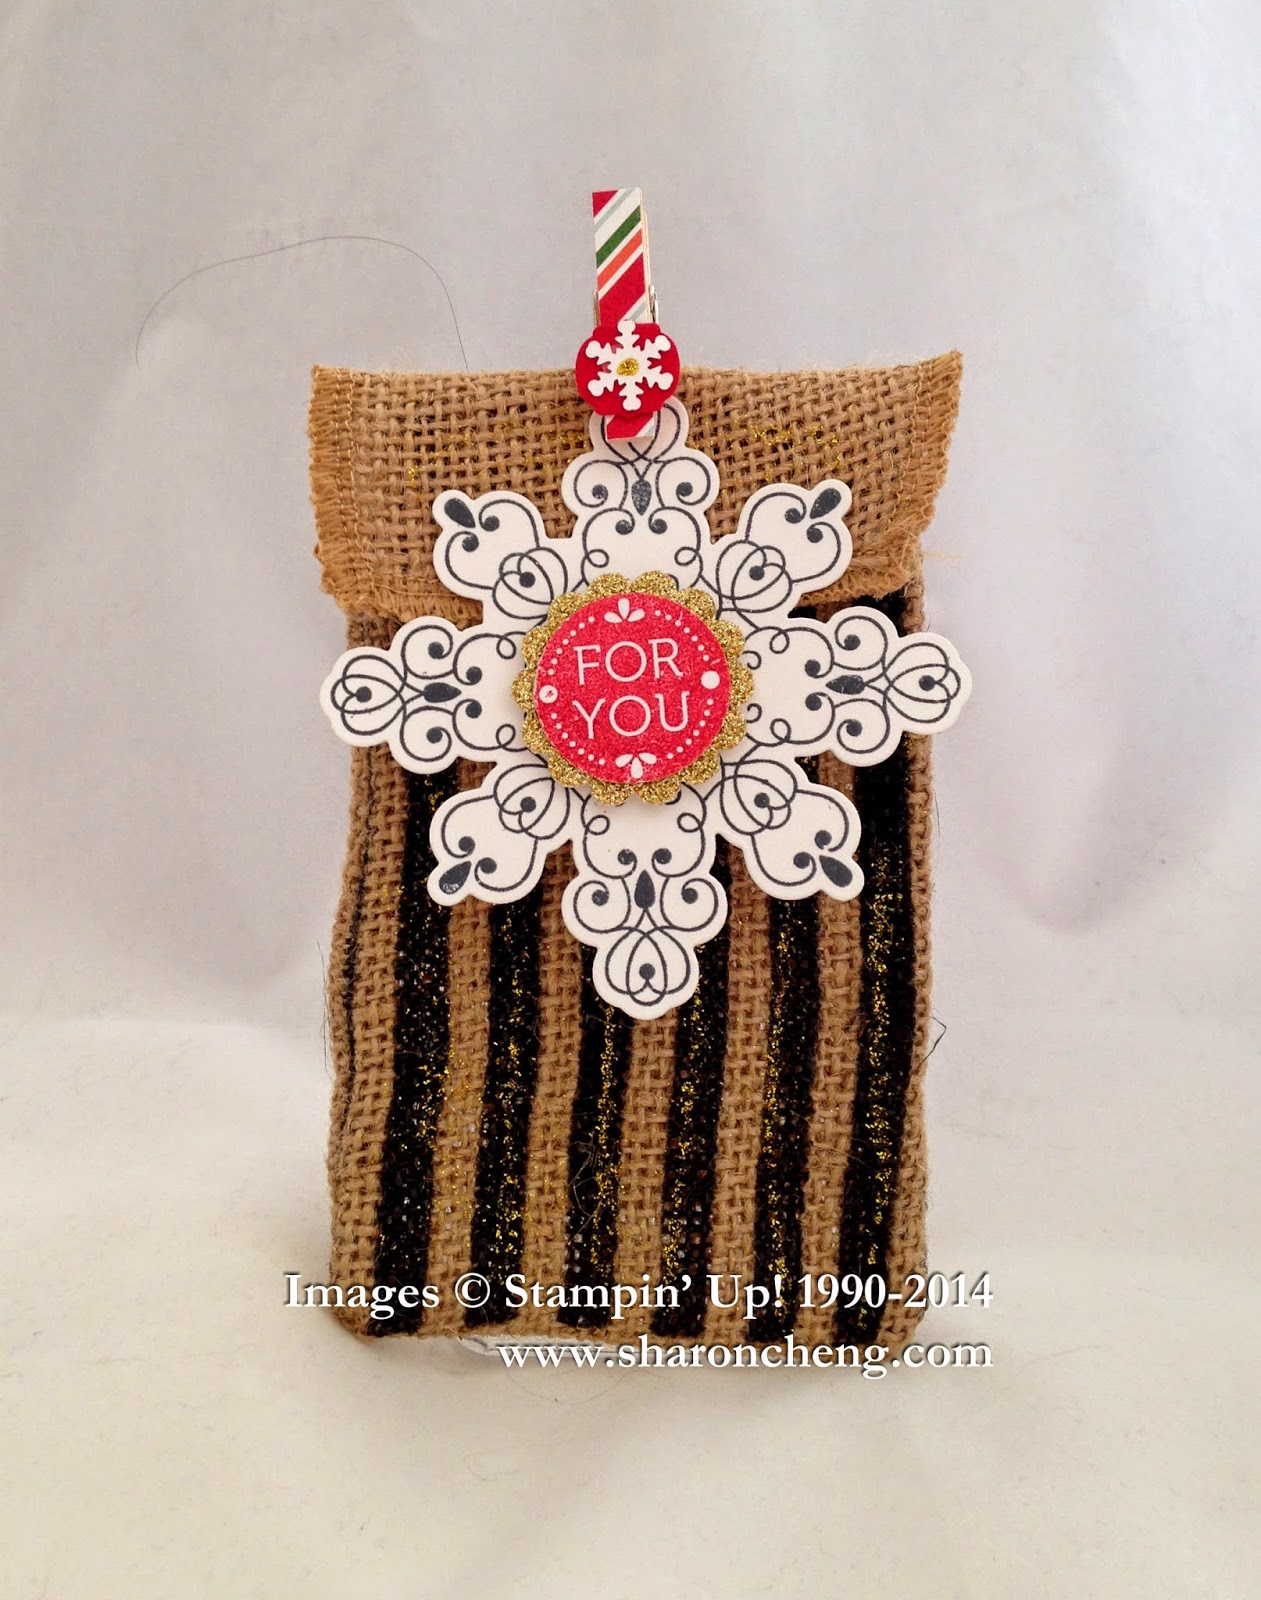
This burlap bag fits a gift card or cash and can be adapted to fit different occasions by changing out the snowflake tag.


You've probably seen the curvy keepsake box (135853 $32.95) decorated to fit many different occasions.  This little Santa box is perfect for Christmas!  Cindy Peterson made this one for a demonstrator swap.

Are you ready to make your Stocking Stuffers? 

Visit my online store to get what you want for your next project.  Remember that when you purchase $25 or more in product, you are eligible for my Rewards Program.

Creatively yours,

Sharon Cheng
Richland Hills, TX
My Online Store