Home Classes Tutorials Online Store Join

Monday, April 11, 2011

Owl Punch Rose

Punch art is so much fun.  I made 17 of these for a swap and have taught this project in several workshops.  I found instructions for this rose on Valita's blog and changed the flower and leaves slightly.  I added an extra row of petals to make the flower larger and scored the leaves to give them a little more dimension.  You can click on any of the photos to see a close up of the jpg.

Here are the supplies you will need to make the rose.

Two-Step Owl Punch
2 3/8" Scallop Circle Punch
1 1/4" Circle Punch
5-Petal Flower Punch
Tangerine Tango Card Stock
Pear Pizzazz Card Stock
Rose Red Classic Ink Pad
Cherry Cobbler Classic Ink Pad
Always Artichoke Classic Ink Pad
Sponge
Champagne Mist Shimmer Paint
Multipurpose Liquid Glue
Mini Glue Dots
Bone Folder
Paper Snips


Punch out 12 owl bodies in Tangerine Tango.  Trim the feet to form a rose petal.  Sponge with Rose Red.  Lightly sponge with Cherry Cobbler.  Roll the petal lengthwise and then roll back the top edge.  Make a 1/2" cut at the center bottom of each petal.


I used a chopstick to help me roll the petal lengthwise first and then to roll back the top edge.


After cutting a 1/2" slit at the bottom of each petal, you'll cross over and glue the two halves to form a cup in the petal.  The petals will be tighter as you get closer to the center of the flower.  You control how much each petal is cupped by how much you cross over the bottom halves.  If you look closely at the picture above, you can see how the bottom of the petal on the left is a narrow "V" shape.  The petal on the right has a much wider opening on the bottom.  It's much easier to see the detail if you double click on the above photo.


You'll make 3 of the inner petals, 4 of the medium petals and 5 of the outer petals.


Punch a 1 1/4" circle and attach the five outer petals to form the first ring of petals. 


Stagger the medium petals to form the second row.


Add the inner petals for the last row.


To form the center of the rose, punch the scallop circle and cut in a spiral.  Sponge with Rose Red and Cherry Cobbler.


I put a mini glue dot on the first part of the spiral and rolled it around a chopstick.  You'll roll from the outside of the spiral to the center.  Your flower will be very tight to start.  Let it unroll a little so that it forms a small flower that fits the opening in your rose. 


I used mini glue dots to attach the rolled flower to the last part of the spiral.  I then glued it to the center of the rose using the multipurpose liquid glue.

I spritzed each rose with Champagne Mist Shimmer Paint mixed with hair spray.  The mixture was about  10% shimmer paint and 90% hair spray.


For the leaves, I punched the 5 petal flower out of Pear Pizzazz card stock.  I scored the center of each leaf.  I then sponged it with Always Artichoke and very lightly with Cherry Cobbler.  Cut out the leaves and attach them to the rose using mini glue dots.


I put the rose on a Bitty Box that I die cut out of Chocolate Chip card stock using the Big Shot.  The top of the box is layered with Paisley Petals paper and then the rose with leaves.

I hope you enjoy making this Owl Punch Rose.

Visit my online store to get your supplies for this project.  Remember that when you purchase $25 or more in product, you are eligible for my Rewards Program.

Creatively yours,

Sharon Cheng
Richland Hills, TX
My Online Store

Tuesday, March 29, 2011

Join My Stampin' Up! Family

I just had to share this card that the newest demonstrator in my group, Karen Hale, taught at her very first Stampin' Up! workshop.  This card uses the following stamp sets:  Inspired by Nature, Flight of the Butterfly and Teeny Tiny Wishes.  I loved the technique of placing the small piece of Whisper White card stock on top of the larger piece and then stamping the grass on the two pieces at the same time.

This card was cased from a similar card designed by Ilina Crouse.  Karen found it on a Stampin' Up! website that is exclusive to demonstrators.  She searched by the name of the stamp sets that she had until she found this card.  One of the nicest things about the Stampin' Up! family of demonstrators is how much they are open to sharing their projects.

During Sale-A-Bration, you can join my Stampin' Up! family with a 15% discount off of the regular starter kit and you'll also get an additional $50 in free products.  Our group meets monthly at Ol' South Pancake House in Fort Worth.  We have swaps that you can join, retreats a couple of times a year and right now we're planning to go to convention in Salt Lake City in July.  Whether you choose to join with yourself as your biggest customer or if you want to build a business, it's great fun with a low initial investment.

For more information, you can go to my website or contact me at sharon@sharoncheng.com.

Creatively yours,

Sharon Cheng
Richland Hills, TX


Thursday, March 17, 2011

Happy St. Patrick's Day!

Happy St. Patrick's Day!  My demonstrator group did a swap where the predominant color had to be green.  We got many different projects which I'll be sharing this month.  I thought I would share some of the St. Patrick's Day items to help celebrate today.  This card was made by Cindy Peterson.  It's a beautiful card.  What you can't see is the light champagne shimmer on the card.  Cindy mixed some champagne mist shimmer paint with hair spray and spritzed it all over the card.  Great job, Cindy!

At our demonstrator meeting, Christi Beck gave each of us this little leprechaun pin.  If you see me today, I'll be wearing it on my jacket.  He's such a cute little guy.  Thank you for the gift, Christi!

To see some other St. Patrick's Day projects, please go to my Facebook page.   You can find me at Sharon Cheng, Independent Stampin' Up! Demonstrator.

Creatively yours,

Sharon Cheng
Richland Hills, TX
My Stampin' Up! Website


Friday, February 25, 2011

Adding Labels to Clear Mount Stamps


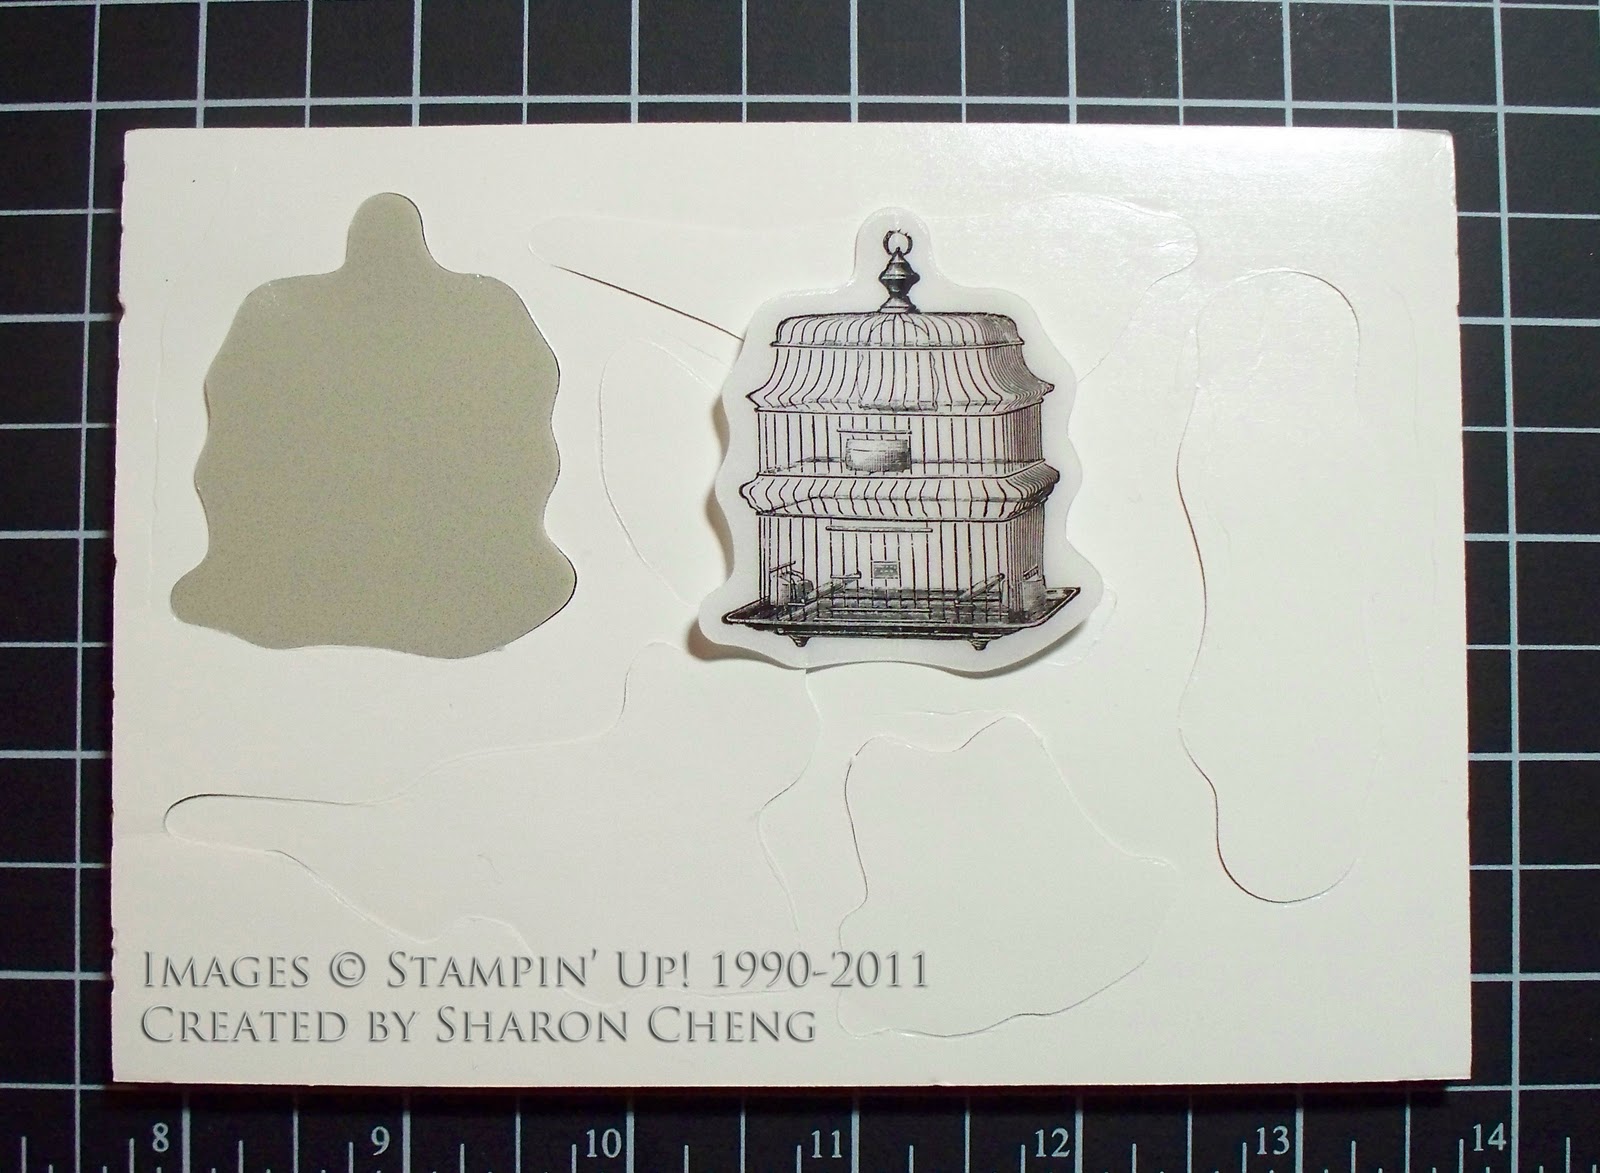
I use a different technique to put the labels on my clear mount stamps than the instructions given by Stampin' Up!  I started putting the labels on with this method because it's easier for me to line up the image with the stamp this way.  Several people have asked me to post instructions for my technique.  So here is my tutorial for how I add labels to Stampin' Up!'s clear mount stamps.


This is one of my favorite stamp sets in the Occasions mini catalog, Nature Walk.  As you can see, the Stampin' Up! clear mount stamps come with die cut rubber stamps and labels.  I leave the rubber stamps attached to the sheet that they come in.  That way the stamps stay in place while I'm adding the labels.

I remove the backing from one stamp and get the matching label.
 

The backs of all of the labels have two parts.  I peel the backing off of half of the label.


I hold the sticky side of the label up while I line up the part of the label with the backing still on it.  It isn't sticky, so you can take the time to line up the image.  Since the label and stamp are die cut, it's easy to line them up. 


I press down the sticky side of the label in the center and then out toward the edges.  That way you avoid trapping any air bubbles between the label and the stamp. 


After this step, your label will look like this.  Half of the label is attached to the foam while the other half still has the backing on it.


Pull back the label to remove the other half of the backing.


Then press the label from the center out to the edges.  You can see how the label is lined up with the stamp.


Repeat with the rest of the stamps.  I then punch the stamps out of the sheet and they are ready to use.  When storing my stamps in the DVD case, I leave the stamps in the sheet.  That way it's easy to make sure I have put all of the stamps back in the correct case.

Creatively yours,

Sharon Cheng
Richland Hills, TX

Monday, February 14, 2011

Happy Valentine's Day

Last Friday was our monthly demonstrator meeting.  Judy Hogan made this lovely Valentine's Day card using the Lots of Love Letterpress plate.  She used Whisper White craft ink on the letterpress plate and ran it through the Big Shot with Crumb Cake card stock.

Judy has used both craft and classic ink on the letterpress plates.  She finds that either type of ink works when she uses a rubber brayer to apply the ink.  The letterpress plate debosses the image so that it also adds texture to the card.

Creatively yours,

Sharon Cheng
Richland Hills, TX


Sunday, January 30, 2011

My New Facebook Page

Here is my new Facebook profile picture.  It's a photo from the Managers' Reception at the 2011 Leadership Conference.  Stampin' Up! has an extra special evening for demonstrators with the title of Manager or higher.  They reserved the Wild Horse Saloon at downtown Nashville just for Stampin' Up!

We had a fun evening with dinner, live music and line dancing.  I'm showing my dancing experience when I tell you that in my day, line dancing was done to disco music and called doing the Hustle.


One of the performers was Dave Robbins.  He was a singer with Blackhawk and has written songs for artists ranging from Conway Twitty to Eric Clapton.  You can listen to his music at http://thedaverobbins.com/


The other group was Brother Trouble.  They have toured with Kenny Chesney.  You can catch their sound at

There are more photos in my Facebook leadership album.  If you are reading this on my blog, please click on the Facebook link in the left hand column to go to my Facebook page.

Creatively yours,

Sharon Cheng
Richland Hills, TX
My Blog at http://www.sharoncheng.com
My Website at http://www.sharoncheng.stampinup.net

Tuesday, January 25, 2011

Sale-A-Bration Has Started


Sale-a-Bration 2011 has started!  During Sale-A-Bration, you can earn free stamp sets and other great items.  There are three ways to Sale-A-Brate:  as a customer, a hostess or by becoming a demonstrator.  Click here for more details. 

So far, among my customers, the two favorite stamp sets have been Punch Bunch and Bliss. You can these stamp sets and other Sale-A-Bration items by clicking here to get the catalog. 

Here are some cards that use Punch Bunch and Bliss.


This is a card that I made using the Bliss stamp set and the Beautiful Wings embosslit.

Shauna Mikuliak made this card using the same stamp set.  The deep purple color is Concord Crush.  If you are a TCU fan (I live in a suburb of Fort Worth), this color is the closest to TCU purple that I have seen in card stock, ribbon and ink.

This last card was made by my newest demonstrator friend, Sue Manlove.  I met Sue and her husband, Larry, my first day in Nashville as we were waiting for the bus to go to the Gaylor Opryland hotel.  While the hotel was within walking distance, it was below freezing every day, so Larry kindly drove us back and forth to the hotel. 

If you would like to take advantage of the Sale-A-Bration promotion as a customer, hostess or demonstrator, please contact me at sharon@sharoncheng.com.  In addition to the bonus bundle provided by Stampin' Up!, I have a little something extra for the first person who signs up under me during this special.

Creatively yours,

Sharon Cheng
My Stampin' Up! Website