
Here are the last pictures of the items from our demonstrator Sneaky Santa Christmas gift exchange.
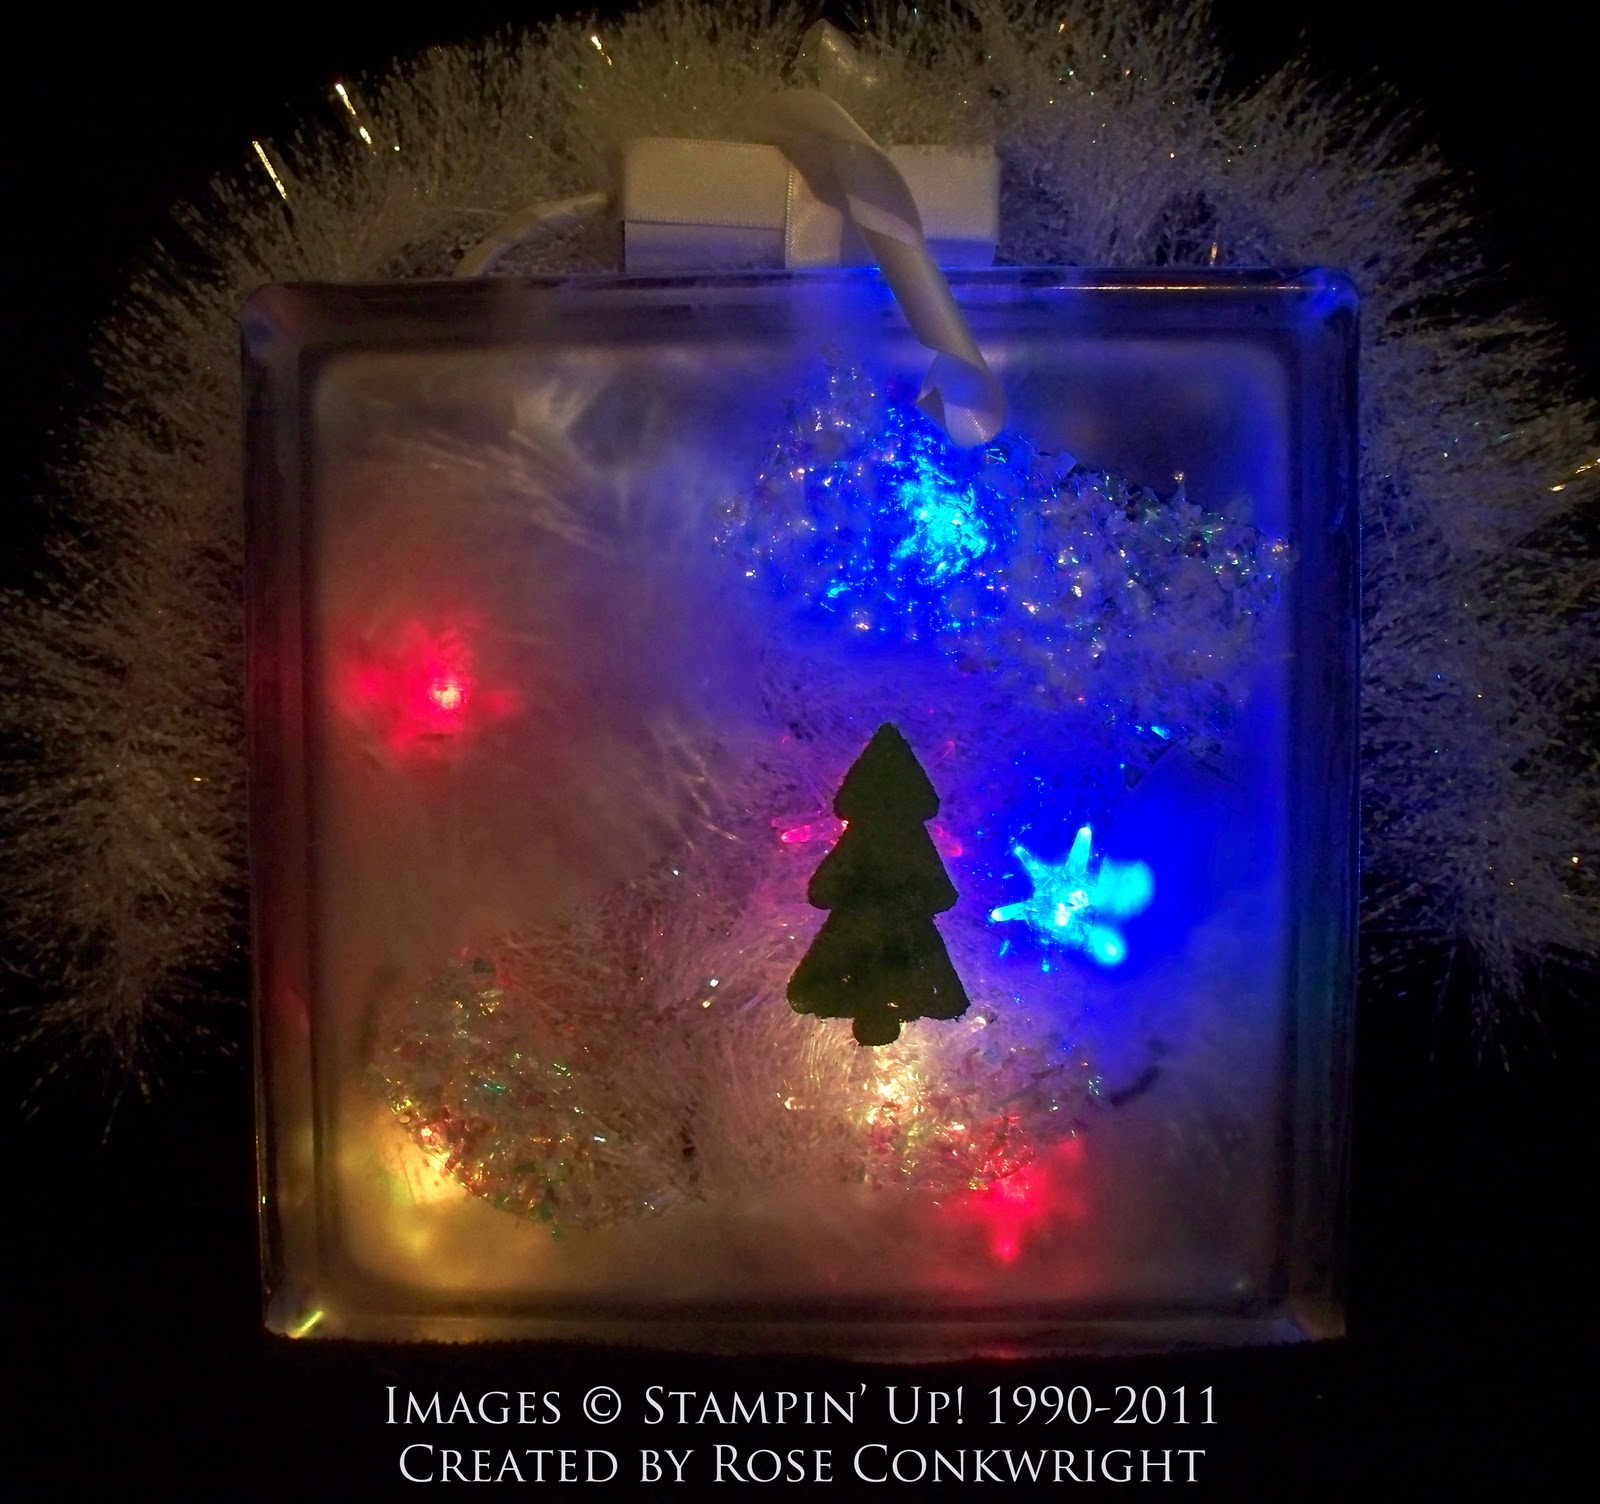
I was the lucky person who got this glass block which was made by Rose Conkwright. The first picture shows how she etched and embossed the glass. The second photo shows how it looks when you turn on the lights inside the block. I enjoy having this as one of the Christmas decorations in my home.
Teresa Goff made this vase filled with ornaments. My photo doesn't do this project any justice. You can barely see one of the snowflake rub ons that she added to the vase.
Terry made this scarf using some of our Stampin' Up! exclusive fabric. It's nice and warm with the fleece backing. I love the fleece and fabric button on the scarf. The big button is from our Holiday mini catalog.
It's been a lot of fun sharing the talent in our group. Several people have asked where we get our ideas. The answer is from many different places. Stampin' Up! has a demonstrator-exclusive site that has over two hundred thousand samples! There are many other Stampin' Up! websites where you can find lots of ideas using our products. Many of us are Pinterest fans. You can see how I got some of my ideas on my From This to That Board. And we share projects in our monthly demonstrator meetings. These are just a few of the places where we get our ideas. The more ideas you see regularly, the more opportunities you have to be inspired.
If you have considered becoming a Stampin' Up! demonstrator and would like more information, please contact me at sharon@sharoncheng.com. We have both business-building demonstrators and hobbyists in our group. There is a special for demonstrators who sign up during Sale-A-Bration which starts on January 24th. You can get our starter kit at the discounted price of $125 AND a free paper pack or digital download every month for the rest of the year. This may be the best way to use any Christmas money that you get and give yourself a gift that keeps on giving!
Creatively yours,
Sharon Cheng
My Pinterest Boards
Tuesday, December 20, 2011
Monday, December 19, 2011
Still More Christmas Projects from our Demonstrator Swap
Here are still more pictures of the items we had in our swap for our demonstrator Christmas party. I was talking to someone from Stampin' Up!'s home office and he said he was impressed with the quality of work that our group does. I had to agree!
This 12 x 12 canvas was made by Karen Parker. It hangs up on the wall with a picture of someone who has been naughty or nice!
Linda Brown made this machine applique towel using our Big Shot stocking die. Linda is a talented seamstress who combines her love of fabric and sewing with Stampin' Up! products.
Marilyn Young made this fabulous shadow box filled with flowers. Notice how she did some doodling in the flowers from Flower Fancy. Marilyn teaches this technique in some of her classes. You can find out more on her blog at Blessed Creativity.
I'll post the last of our Christmas projects tomorrow. I hope you have enjoyed seeing the diverse creativity in our group. It's so inspiring to be with this group of women!
Creatively yours,
Sharon Cheng
My Online Store
My Pinterest Boards
My Facebook Business Page
Tuesday, December 13, 2011
Looking for a Last Minute Stocking Stuffer?
Are you looking for a last minute stocking stuffer? Check out this mini dry erase board. I made it by designing a 4 x 6 inch image in My Digital Studio and putting it in a 4 x 6 inch acrylic frame.
Then I added this piece of card stock on the back to hold the dry erase marker. It's a quick and easy project that you can personalize to fit that special person in your life.
In a hurry? You can get the image and instructions for free when you like my Facebook business page.
Creatively yours,
Sharon Cheng
Richland Hills, TX
My Online Store
My Pinterest
Friday, December 9, 2011
More Demonstrator Gifts
Here are some more of the gifts that we had at our Christmas party. This arrangement was made by Gail Peterson. You can find her blog at Gail Peterson's Crafts. In the close up picture here, you can see how she stamped and punched out different embellishments.
This is how the arrangement looks in a vase.
Joni Lawrence made this Christmas tree out of rosettes. She used our red glimmer paper to make the tree skirt and the ball on top. You can her blog at jonilawrence.com
Judy Hogan made her project using a silver picture frame. It's a beautiful home decor item to celebrate Christmas. You could use the same idea for a wedding gift. Judy's blog is at bluebonnetstampers.
Believe it or not, there are still more gifts to post. I plan to get that done this weekend!
Creatively yours,
Sharon Cheng
Richland Hills, TX
My Online Store
Thursday, December 8, 2011
Demonstrator Gift Exchange
At our Stampin' Up! Demonstrator Christmas party, we have a gift exchange. Here are some of the gifts that the demonstrators in our group made. The tree was made by Cheryl Hart. She used the First Edition Specialty Designer Series Paper to make the ruffles. The antique brad in the middle of the star looks great.
Christi Beck made a combination of gifts. The Workshop binder is a great way to organize ideas by month for 2012. The CD Calendar in the top right corner is a hybrid project with a printed calendar and stamped embellishments. The third project is a notepad in one of our clear mount stamp cases. What a cute combination of projects.
This stunning necklace and earring set was made by Cindy Peterson. Many of the flowers are made using Stampin' Up!'s Deck The Halls Designer Fabric. I love how she used buttons and antique brads in this project.
Keep checking back for more of the projects that were a part of our gift exchange. As you can tell, this is a talented group of women!
Creatively yours,
Sharon Cheng
Richland Hills, TX
My Online Store
Wednesday, December 7, 2011
Christmas Frame
At our demonstrator Christmas party, we have a Sneaky Santa gift exchange. The gift that I made was another Pinterest-inspired project. When you go to my Pinterest From This to That board, you can see where I got some of the ideas for this project.
The frame was brown wood that I painted white. Kilz primer did a great job of covering the dark brown. I did figure out that if you are going to add the wires, it's easier to find a frame with wider pieces of wood. I ended up having to go to a hardware store to get wood screws that were small enough to not go all the way through the frame. I'm working on a second frame where the wood is over an inch wide and it was much easier to add the screws and wire.
DH helped me attach the wire to the screws. We put the screws on opposite sides of the frame. While they were firmly attached, they were not in a far as you could go. He then wrapped the wire around the screws keeping the wire as tight as possible. When you tighten the screws a little more, that pulls the wire tighter. I hope this make sense. I'm glad he figured out how to do that. You can get the miniature clothespins from my online store.
Here are some close ups of the individual items. The red and silver glimmer paper look much better in person. All of the images in this project come from My Digital Studio. I printed them on either First Edition Specialty Designer Series paper or Very Vanilla card stock. To print on the First Edition paper, I cut the 12 x 12 sheet to 8 1/2 x 11 so it would fit in my printer.
![]() |
| Welcome Christmas stamp brush set |
Have fun making your version of this project. I'll post some of the other items that were in the Sneaky Santa gift exchange later this week.
Creatively yours,
Sharon Cheng
Richland Hills, TX
Labels:
Big Shot,
Christmas,
Holiday,
My Digital Studio,
Project
Tuesday, November 15, 2011
Quick and Easy Stocking Stuffers
Every year we have fun helping everyone make their stocking stuffers for family and friends on their Santa list. This year we have 4 projects to choose from: a bookmark, reindeer pencil, candy purse and snowman pail. You can pre-order kits in any amount you would like, so mix and match your projects to fit what you need. The cost for each kit is $1.
At the class you'll make one of each project so you'll have a completed sample to take home. Then you'll take the rest of your kits home to assemble. You do have to pre-register for this class and let us know how many of each project you want to make so we can have them ready for you.
Date: Saturday, December 3rd
Time: 1 to 4 p.m.
Location: Bedford, TX
We have a limited number of snowman pails, so if you want to make this project, please register early. Once the pails are gone, we won't be able to take any more orders for these kits. To register, please e-mail me at sharon@sharoncheng.com.
Creatively yours,
Sharon Cheng
My Website
Subscribe to:
Posts (Atom)


